How to Install PS2 BIOS on Every Platform (PCSX2, Android, Steam Deck, RetroArch, EmuDeck)
You installed the emulator, grabbed your game file, hit play, and got a blank screen or a message that says “No BIOS file found.” Nothing on your end is broken. Your emulator works fine, and your game file is fine too. There’s just one file missing, and until it’s in the right folder, nothing will boot.
That file is the PS2 BIOS. It’s small, usually just a few megabytes, but every single PS2 emulator needs it to work no exceptions. The tricky part isn’t getting the file itself, it’s knowing exactly where each emulator wants it placed, because PCSX2, RetroArch, AetherSX2, and EmuDeck all handle this a little differently.
This guide covers every platform people actually use in 2026: PCSX2 on desktop, Android emulators, Steam Deck, EmuDeck on both Steam Deck and Windows, and RetroArch. Pick the section that matches your setup, follow it exactly, and you’ll be playing within a few minutes.
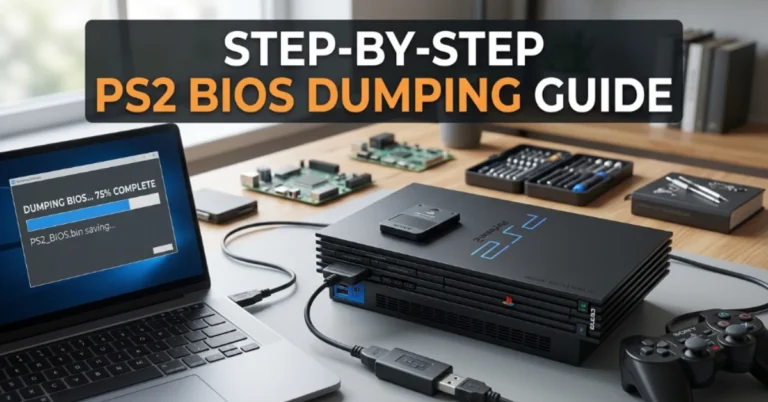
If you’re still wondering how to get PS2 BIOS in the first place, the short answer is dumping it from a console you own we’ll cover what that file should look like once you have it.
Before You Start: What You Actually Need
Three things need to be in place before any of the steps below will work.
A real PS2 BIOS file. This is the firmware your actual PlayStation 2 used to boot. It’s usually around 4MB per regional version, and it comes as a .bin file. Emulators don’t include this you have to source it separately, most commonly by dumping it off a PS2 console. If you’re searching for a bios ps2 download, be careful where you look. A lot of the sites that show up in search results bundle their downloads with junk software or hand you a corrupted file that will cause nothing but headaches later.
An extraction tool. BIOS files almost always come zipped. On Windows or Linux, 7-Zip handles this fine. On macOS, the Unarchiver works well. On Android, ZArchiver is the standard choice. This step matters more than people expect see below.
The right emulator for your device. PCSX2 for desktop, AetherSX2 or RetroArch for Android, and EmuDeck if you’re setting up a Steam Deck or building an all-in-one emulation folder on Windows.
Here’s the part that trips up more people than anything else in this whole process: the BIOS file has to be fully extracted before you place it anywhere. Every emulator, on every platform, reads the raw .bin file. If it’s still sitting inside a .zip or .7z archive, the emulator won’t see it, no matter which folder you drop the archive into. Extract it first, confirm you can see the actual .bin file sitting on its own, and only then move it into place.
How to Install PS2 BIOS on PCSX2 (Windows, macOS, Linux)
PCSX2 is the emulator most people land on first, and for good reason it’s actively developed, runs well on modest hardware, and setting up the BIOS takes about two minutes once you know where to look. If you searched for how to install PCSX2 BIOS or how to set up PCSX2 BIOS and landed here, the three methods below cover every situation you’ll run into.
Method 1: During First Launch (Setup Wizard)
If this is a fresh install, PCSX2 walks you through a setup wizard the very first time you open it.
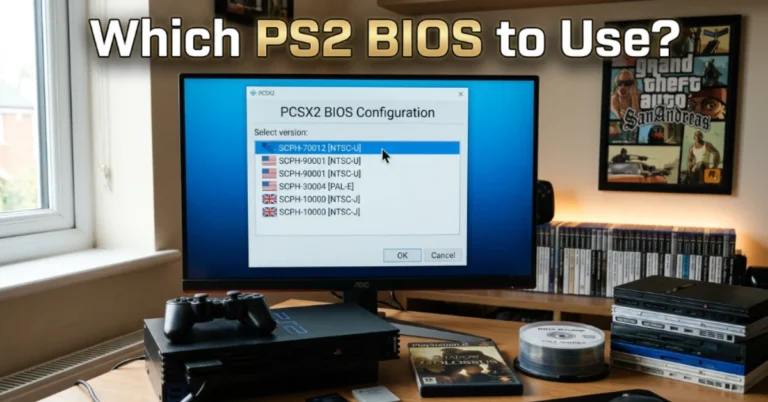
Pick your language, click through the intro screen, and you’ll land on a page asking for your BIOS directory. Click Browse, and point it to the folder where your extracted .bin file lives, and confirm. PCSX2 scans that folder automatically and lists every valid BIOS it finds if you have more than one regional version sitting there, they’ll all show up. Pick the one you want (most people go with a US version, like SCPH-39001 or SCPH-70012, since it has the broadest compatibility), then continue through the rest of the wizard.
Method 2: Fast Boot vs. Full Boot
Once your BIOS is in place, PCSX2 gives you two ways to start a game.
Fast Boot skips straight past the PS2 startup animation and jumps into your game. This is what almost everyone uses day-to-day.
Full Boot plays through the entire real startup sequence logo, chime, memory card screen, all of it exactly like flipping the power switch on an actual console. You’ll want this occasionally: some older titles (Final Fantasy X is a common example people run into) behave oddly on Fast Boot and need the full sequence to load properly, and it’s also useful if you ever need to get into BIOS-level settings like system language.
You can flip between the two anytime under Settings > BIOS
Method 3: Through Settings After Launch
This is also the answer if you’re looking for how to put BIOS in PCSX2 or how to add BIOS to PCSX2 after the fact, without redoing the whole setup wizard. Already have PCSX2 running and just need to add or swap a BIOS file? Go to Settings > BIOS, click Browse next to the directory field, and select the folder you .bin file is in. Give it a second to rescan, pick the version you want from the list that appears, then hit Apply.
On Windows, PCSX2’s default BIOS folder sits at C:\Users\[YourUsername]\Documents\PCSX2\bios, though you’re free to point it anywhere. On macOS, it’s typically under ~/Library/Application Support/PCSX2/bios/. On Linux, look in ~/.config/PCSX2/bios/ — and since that’s a hidden folder, you’ll need to enable “show hidden files” in your file manager to see it at all (Ctrl+H does this in most Linux file managers).
How to Install PS2 BIOS on Android (AetherSX2)
AetherSX2 was, for years, the standard PS2 emulator on Android. Its original developer stopped active development a while back, but the app still runs well on most phones, and plenty of people continue using it without issues.
Since it’s not distributed through the Play Store, you’ll need to grab the APK from a source like GitHub or Archive.org and sideload it, which means enabling installation from unknown sources in your phone’s security settings first.
Open the app and you’ll land on a welcome screen. Tap through it, adjust performance settings if you want (the defaults are fine for most phones), and you’ll reach the BIOS import screen. Tap the “+” button, and your phone’s file browser opens — navigate to wherever your extracted BIOS file is sitting (usually your Downloads folder unless you moved it), and select it. It’ll show up in the list tagged with its region, something like “USA NTSC-U.” Tap Next and you’re done.
If you skipped this during setup or need to change it later, go to Settings > Core Settings > BIOS, tap Browse, and pick your file the same way.
For most Android phones, an SCPH-39001 (USA) BIOS gives you the best mix of compatibility and stability. If you’re mostly playing Japanese or European exclusives, grab the matching regional BIOS instead for the smoothest experience.
How to Install BIOS PS2 Emulator Android (RetroArch)
RetroArch handles PS2 emulation through a separate core rather than baking it into the app itself, and this changes how the BIOS setup works compared to AetherSX2.
Step 1: Install RetroArch
Grab RetroArch from the Play Store, open it once, and close it. That first launch matters it’s what builds the folder structure RetroArch needs on your device’s storage.
Step 2: Extract and place your BIOS file
Using a file manager like ZArchiver or Files by Google, browse to your internal storage and head to RetroArch/system/. Inside that, you need a folder called pcsx2, and inside that one, a folder called bios. Create these if they don’t already exist. The full path ends up looking like:
RetroArch/system/pcsx2/bios/
Drop your extracted .bin file directly inside that bios folder. One detail that catches people out: both folder names need to be lowercase. RetroArch’s PS2 core (called LRPS2) is case-sensitive about this, so a folder named “PCSX2” instead of “pcsx2” will cause the core to miss the file entirely, even though it looks identical at a glance.
Step 3: Download the PS2 core
Open RetroArch, go to Main Menu > Load Core > Download a Core, and search for “Sony – PlayStation 2 (LRPS2). ” If you don’t see it listed, check Settings for an option to show experimental cores and enable it.
Step 4: Load your game
Head to Main Menu > Load Content, browse to your game file, and pick LRPS2 when it asks which core to use.
One thing worth knowing before you go this route: the LRPS2 core is genuinely demanding, and it doesn’t run natively on most phone chipsets. Realistically, you need something in the Snapdragon 8 Gen 2 class or newer for it to run acceptably. If your phone is mid-range or older, AetherSX2 is still going to give you a much better experience.
How to Install PS2 BIOS on Steam Deck (via EmuDeck)
EmuDeck is what most Steam Deck owners use to set up emulation, since it builds out the folder structure and configures PCSX2 for you instead of making you do it by hand. Getting a PS2 BIOS Steam Deck setup working through it is genuinely one of the more painless parts of the process, once you know the one rule that trips people up. This is also where most PS2 BIOS EmuDeck questions come from, since the shared folder structure works differently than a standalone PCSX2 install.
Hold the power button and switch to Desktop Mode first. EmuDeck installs from there, not from Gaming Mode. Open a browser, go to the EmuDeck site, download the installer, and run it. Let it finish; it’ll build a full Emulation folder with subfolders for every console it supports, PS2 included.
Once that’s done, open Dolphin (the Steam Deck’s file manager) and navigate to Emulation/bios. This is the shared BIOS folder every emulator EmuDeck installs will check by default. Drop your extracted BIOS file straight in here.
This next part matters more than almost anything else in this guide: place the file directly inside the bios folder, with no subfolder in between. Don’t create a “PS2” folder or a “PCSX2” folder inside bios EmuDeck’s own documentation is explicit about this, and PCSX2 simply won’t find the file if there’s an extra folder layer between it and bios itself.
Once it’s placed, open the EmuDeck app and check under Tools and Stuff > BIOS Checker > Check Again. If everything’s in the right spot, it’ll confirm the PS2 BIOS was detected. Switch back to Gaming Mode, and your best PS2 games should launch without complaint.
If you installed EmuDeck onto an SD card instead of internal storage, the same rule applies you’re just looking at Emulation/bios inside the SD card’s own directory rather than under /home/deck.
How to Install PS2 BIOS on EmuDeck (Windows)
EmuDeck isn’t limited to Steam Deck there’s a Windows build too, and it mirrors the same folder logic, just with Windows-style paths.
Step 1: Install EmuDeck for Windows
Download the installer from EmuDeck’s site and run it. You’ll be asked to pick a storage location your main drive or an external one both work fine. Let it finish building its folder structure and setting up the bundled emulators.
Step 2: Find the BIOS folder
Wherever you told the installer to put things, you’ll find an Emulation folder, and inside it, a BIOS folder. That’s your target.
Step 3: Place your extracted BIOS file
Copy your extracted .bin file directly into Emulation\bios\. Same rule as the Steam Deck version applies here no subfolders. The file needs to sit right at the root of that bios folder.
Step 4: Confirm detection in PCSX2
Open PCSX2 (EmuDeck installs and pre-configures it) and go to Settings > BIOS. In most cases it’ll already show your file, since EmuDeck points PCSX2 at that shared folder automatically. If nothing shows up, click Browse and manually select the Emulation\bios folder.
How to Install PS2 BIOS on RetroArch (PC)
The desktop version of ps2 for RetroArch follows the same folder logic as its Android counterpart, just with a slightly different starting point depending on your OS.
Open RetroArch and check Settings > Directory > System/BIOS to see what your system folder actually is. By default, it’s usually a system folder sitting inside wherever you installed RetroArch, though setups managed through EmuDeck may redirect this elsewhere.
Inside that system folder, create a pcsx2 folder, and inside that, a bio folder, both names lowercase, for the same reason mentioned in the Android section. Your finished path should look like this:
RetroArch/system/pcsx2/bios/
Place your extracted .bin file there. Then head to Main Menu > Load Core > Download a Core, find “Sony – PlayStation 2 (LRPS2),” and install it. Load your game through Main Menu > Load Content and pick the LRPS2 core when asked.
Worth flagging: LRPS2 doesn’t run on ARM-based Windows machines; it needs x86_64 hardware. If you’re on a Mac with Apple Silicon, it does work, but runs through Rosetta 2 rather than natively, so expect a performance hit compared to an Intel Mac or a Windows PC.
If you’re also running standalone PCSX2 on the same computer, know that it doesn’t share BIOS files with RetroArch automatically — you’ll need a copy in each location, since they use entirely separate folder structures unless you’ve manually unified them.
Quick Reference: Correct BIOS Folder Paths by Platform
Whether you’re figuring out how to install BIOS for PCSX2, how to put BIOS on PCSX2, or how to put BIOS into PCSX2 on a completely different platform, the table below sums up every path from this guide in one place.
| Platform | Emulator | BIOS Path |
| Windows (standalone) | PCSX2 | Documents\PCSX2\bios\ (or any folder you choose) |
| macOS | PCSX2 | ~/Library/Application Support/PCSX2/bios/ |
| Linux | PCSX2 | ~/.config/PCSX2/bios/ (hidden folder) |
| Windows (EmuDeck) | PCSX2 via EmuDeck | Emulation\bios\ — root only, no subfolders |
| Steam Deck (EmuDeck) | PCSX2 via EmuDeck | /home/deck/Emulation/bios/ — root only |
| Steam Deck, SD card install | PCSX2 via EmuDeck | [SD card]/Emulation/bios/ |
| RetroArch (PC) | LRPS2 core | RetroArch/system/pcsx2/bios/ (lowercase) |
| RetroArch (Android) | LRPS2 core | RetroArch/system/pcsx2/bios/ (lowercase) |
| Android | AetherSX2 | Any folder — chosen manually during import |
Common Installation Errors and Exact Fixes
“BIOS Not Found” on PCSX2
Nine times out of ten, this means the file is still zipped, or PCSX2 is pointed at a folder that doesn’t directly contain the .bin file. Extract it fully, go to Settings > BIOS > Browse, and select the folder that has the .bin sitting right inside it not a parent folder, not a subfolder. You should see a version appear in the list before you close the settings window; if nothing shows up, the folder is still wrong.
BIOS Not Detected in EmuDeck
If the BIOS Checker says the PS2 BIOS is missing even though you placed a file, check whether it accidentally ended up inside a subfolder within BIOS. That extra folder layer is the single most common reason this fails. Move the .bin file up so it sits directly in Emulation/bios with nothing between it and that folder.
RetroArch Shows Black Screen After Loading Game
This is usually a folder or driver issue rather than a missing BIOS outright. Confirm your path is exactly system/pcsx2/bios/ with both folder names lowercase, restart RetroArch, and if it’s still black, try switching your video driver to Vulkan under Settings > Driver the PS2 core tends to behave better with it than the default option.
AetherSX2 Cannot Find BIOS File After Import
If you already went through the import screen and it’s still showing as missing, the file was probably still zipped when you selected it. Extract it properly with ZArchiver, then redo the BIOS import step and pick the actual .bin file this time.
BIOS File Shows in List but Games Still Will Not Load
This one’s rarely a BIOS problem — it usually points to a region mismatch or a bad game dump. Check your game’s region against your BIOS region (USA titles pair well with SCPH-39001 or SCPH-70012, Japanese titles with SCPH-10000, European titles with SCPH-50003 or SCPH-75004). If the regions already match, try a different copy of the game file to rule out a corrupted dump.
Linux BIOS Folder Not Visible
PCSX2’s config folder on Linux lives at ~/.config/PCSX2/bios/, and Linux hides folders starting with a dot by default. Press Ctrl+H in most file managers to reveal hidden folders, or just type the path directly into your file manager’s address bar to jump straight there.
Tips to Get the Best Performance After Setup
Getting the BIOS installed is really just step one. A handful of settings make a noticeable difference once you’re actually playing.
Use Fast Boot for everyday play
Once your setup is confirmed working, leave Fast Boot on as your default. It shaves several seconds off every launch, and there’s no real downside for the vast majority of games save Full Boot for the rare title that genuinely needs it.
Match your BIOS region to your game region
Even with Fast Boot on, a mismatched BIOS can cause small but annoying issues on certain games, such as audio running at the wrong speed, odd display behavior, and saves that don’t stick properly. Switching to the matching regional BIOS takes seconds and heads off a lot of these problems before they start.
Keep all your BIOS files in one organized folder
If you’re juggling more than one emulator, keep every extracted BIOS file together in a single, clearly labeled folder on your computer. It makes backing everything up trivial, and it means you’re never digging around trying to remember which folder you dropped a file into six months ago.
Switch your renderer to Vulkan
Across both PCSX2 and AetherSX2, Vulkan tends to outperform the older OpenGL renderer on most modern hardware. If your device supports it, switch over it’s usually a straightforward toggle in graphics settings.
Start at 2x internal resolution
Higher resolutions look sharper, but they ask a lot more of your GPU. Start at 2x, see how your hardware handles it, and only push higher if performance stays smooth and consistent.
For Android: enable High Performance mode.
A lot of phones quietly throttle CPU and GPU speed under their default battery settings. Digging into your phone’s performance or battery menu and enabling a high-performance mode can noticeably improve frame pacing in both AetherSX2 and RetroArch.